Author: Landfall Turf

  • How do I go about laying my new lawn?

    How do I go about laying my new lawn?

    So your area has been prepared and most of the hard work has been done, and you are ready to start laying your turf? Many will say it’s seen as putting on the final touches and it the fun part!

    Regardless of what grass you have selected; the laying process is the same.

    Its important to follow the steps set out below, ensuring every step is carefully considered so not only the best outcome can be achieved but also to reduce the amount of work involved.

    Turf delivery – it’s important to ensure that when the turf is delivered it is delivered as close as possible to your new lawn area and/or the point of laying. This reduces the amount of carrying and wheel barrowing of turf therefore allowing the laying process to be faster.

    Lay straight away – it’s important to get the turf laid at the earliest possible moment after it is delivered particularly during hot weather. The longer the turf sits on the pallet, the more it will potentially ‘cook’ and therefore yellow and in extreme cases it can die it its left too long.

    Planning to lay – its recommended to start laying your turf at the closest point to the turf stash and work your way across the newly prepared soil area. This is done to ensure you are not walking over freshly prepared soil disturbing the newly prepared soil levels. Instead, you are working across the turf as you lay it, this means your soil levels will not be disturbed. As laying progresses, turf can be transported using a wheelbarrow. If for any reason the soil levels do get disturbed by footprints or the wheelbarrow, it is important to rake & relevel areas as needed to keep the soil surface flat & smooth.

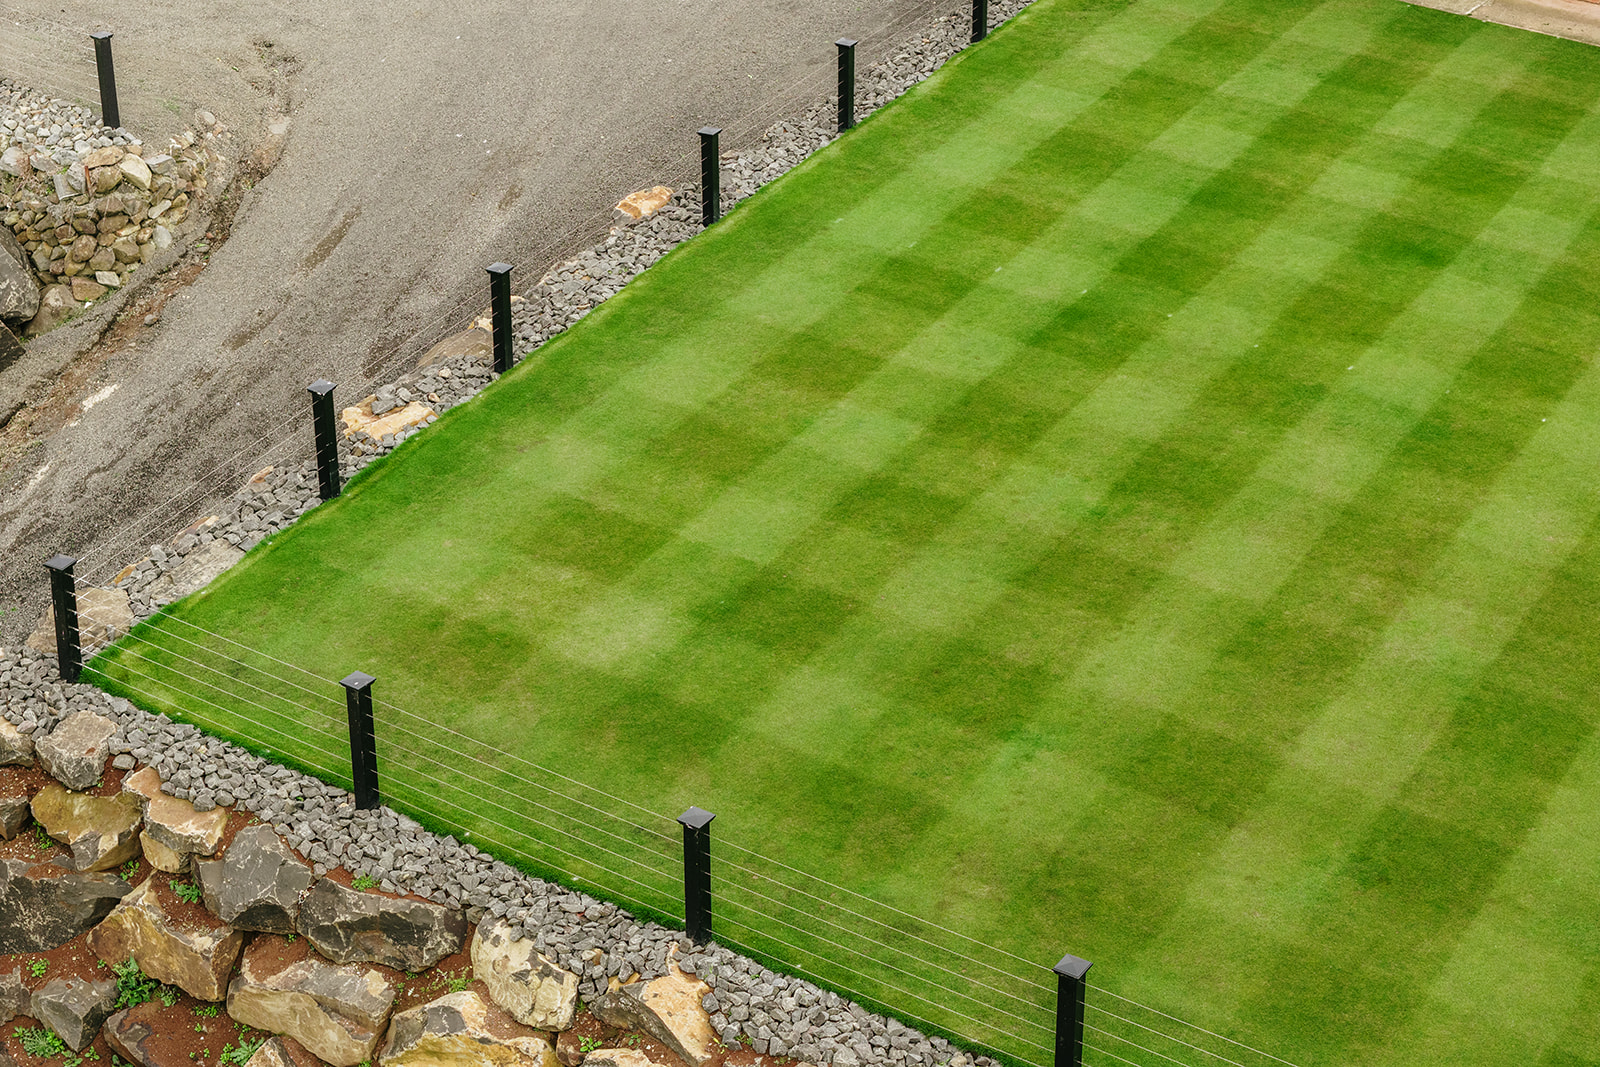
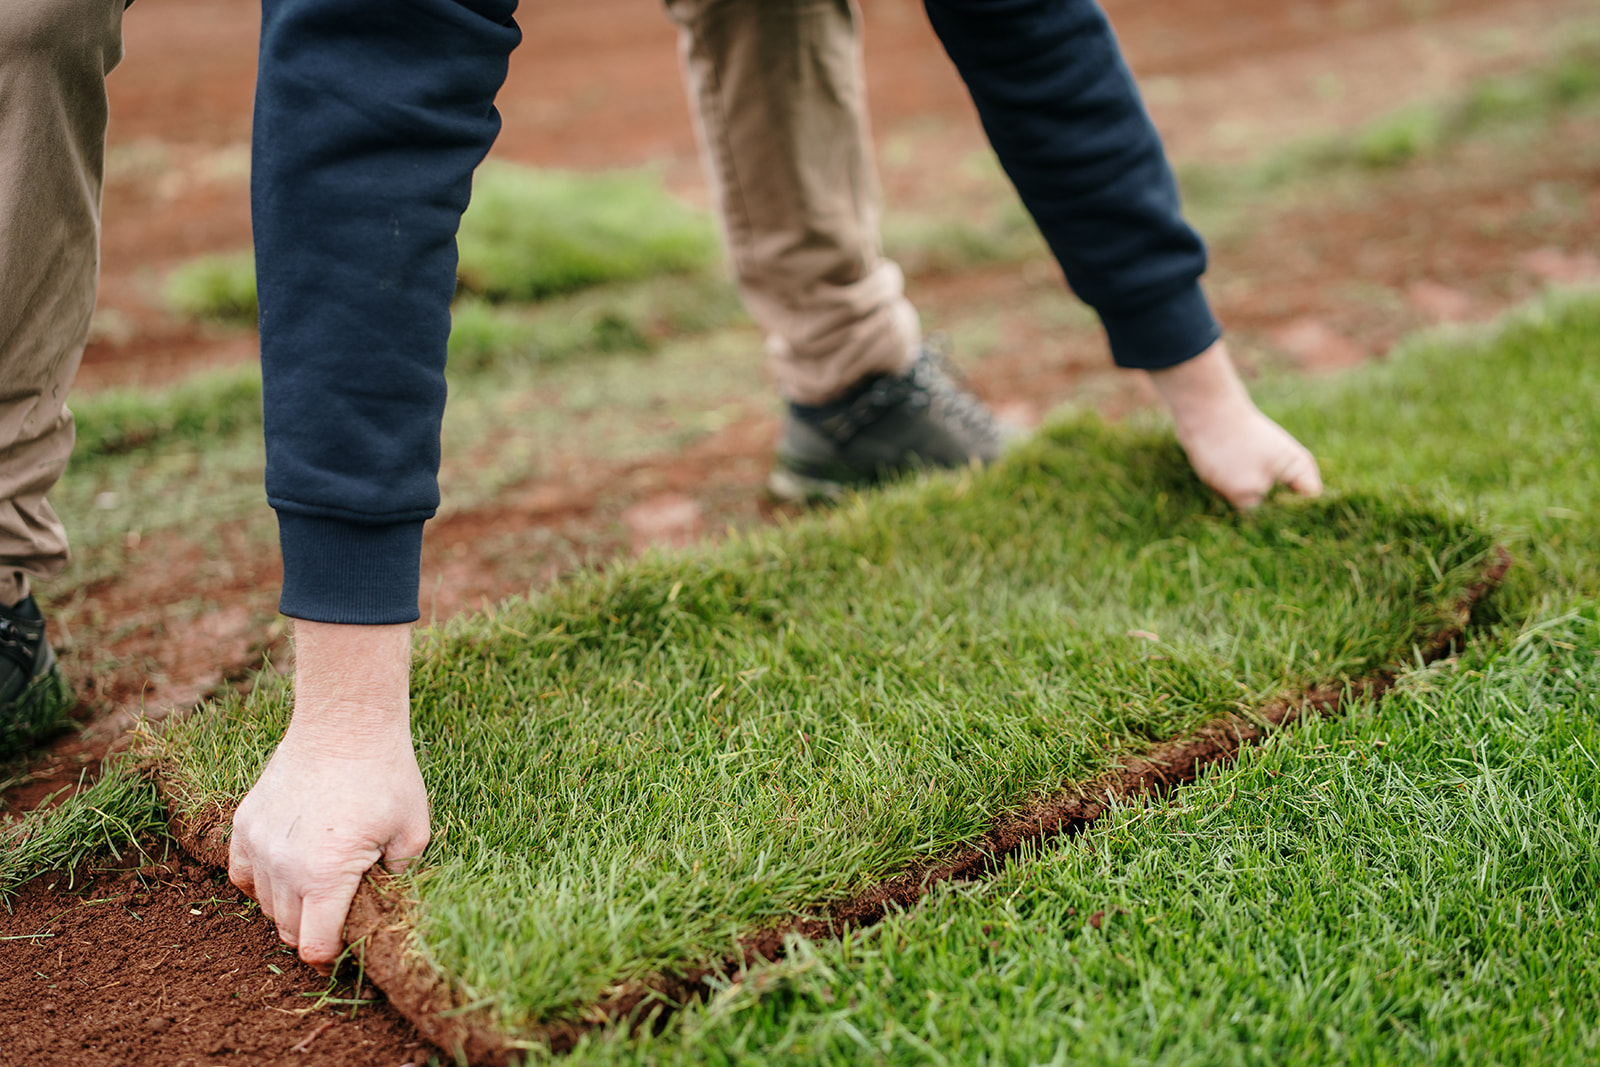
    Actual laying process – It is best to start laying turf up against a straight edge such as a concrete path or a fence. This ensures the laying gets off on the right foot in a nice straight formation. Laying should be done by butting rolls up tightly against each other and laid in a brickwork pattern (in the same way that bricks are laid on a house) as this helps the turf to knit in better during the grow in phase and it also helps to prevent wash out/erosion in the event of heavy rain – when laid in a brickwork pattern water will not have as many straight lines to follow.

    It is important to lay full slabs of turf up against hard surfaces as they are less likely to dry when compared to smaller, odd shape pieces. More generally, try to avoid using smaller pieces where possible as they will dry out easily and require more watering during the early grow in stages. If small pieces do dry out and require replacing this puts these isolated areas back to square one requiring them to be relaid & therefore restarting the watering/establishment. So try to avoid using small pieces where possible.

    Any turf laid overlapping or over run onto paths or hard surfaces can be cut with a sharp knife or spade to the required shape and size. Although not 100% necessary, it is recommended to roll the newly laid turf area to increase the soil – turf contact and increases the success rate of establishment. Rolling also smooths the whole surface; slows the rate the turf will dry out and can reduce the amount of water needed during the first few days.

    Once Laid

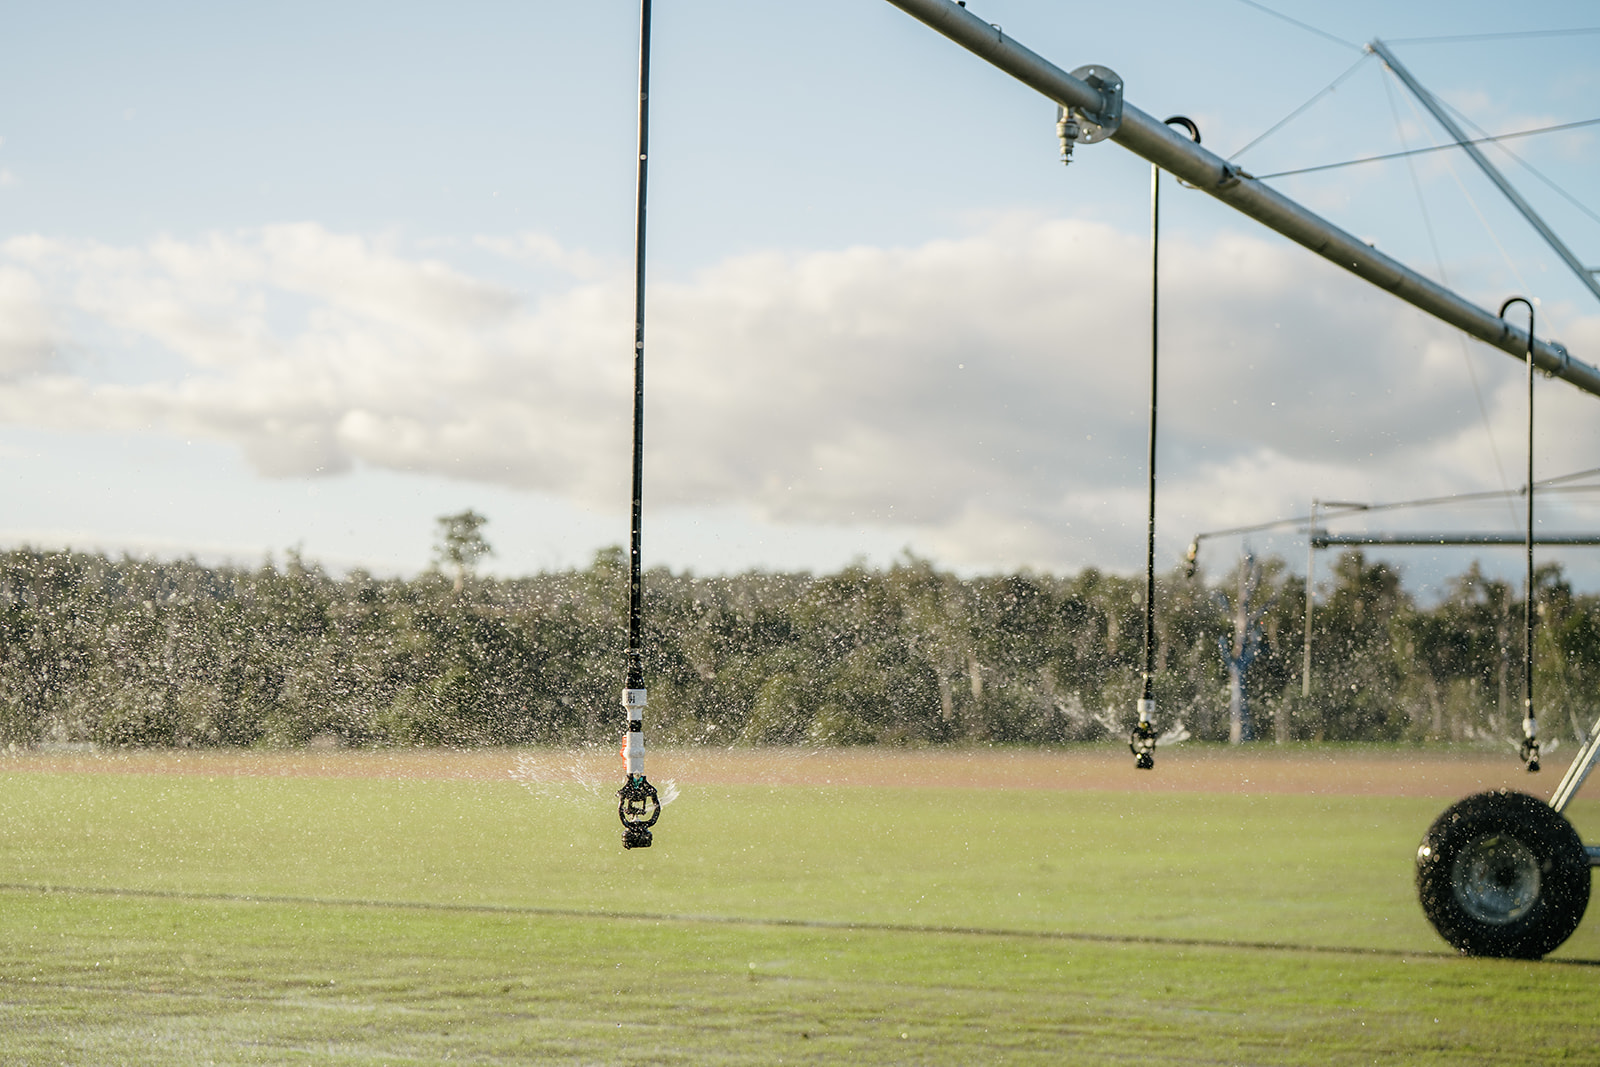
    • Initial Watering: It is important to commence watering at the earlies possible moment. Depending on the temperature and the size of the lawn, if temperatures and really high, it may be a requirement to hand water the newly laid grass as laying progresses. The day the lawn is laid it should be watered at least 3 times that day. This is required to wet the depth of the turf and its associated soil beneath all the way through.
    • Daily Watering: Watering of your new lawn will be required somewhere between 2 to 4 times per day —for the first 7–10 days. It is important to remember once the new turf is laid the only support system it has is the daily watering until such time it starts to grow it’s own roots down into the soil so it can support itself. During watering aim for 5mm to 10mm of water each time to keep the turf and its soil base consistently moist throughout its depth. During this phase its not possible to over water the turf. If you think it needs watering, then it’s likely that it does. The healthier it is, the quicker it will send roots into the soil beneath.
    • Landfall Turf Variety Water Requirements: While there are some variables with how much water each of our turf varieties need, it is not a huge factor, and each species should be treated the same way during this early watering phase.
    • Post-Establishment: It usually takes between 7-10 days for the turf’s root system to anchor down into the soil. This can be easily checked daily by lightly pulling at the turf to check its anchorage. Once the turf root system has fully anchored into the soil watering can gradually be reduced. Once this point has been reached, as a general rule of thumb watering should be first reduced to once per day for approximately 5 days, then to every second day for a few days after this, then eventually to 1-2 times per week (depending on time of year) Once your new lawn’s root system is well established mowing can start. This can be checked by gently pulling at the turf to test the anchorage. Once the anchorage is firm and there is no movement in the turf, mowing can commence. Remember to follow the 1/3 rule and that is to never remove any more than 1/3 of the height of grass in any one mowing.
  • Developing and maintaining your lawn’s root system

    Developing and maintaining your lawn’s root system

    Your lawn’s root system plays a major role in providing anchorage for the lawn against heavy usage and provides support to recover the turf whenever that time may be. In the event where your lawn has been allowed to dry out excessively for whatever reason (i.e. water shortage problems) a good root system will keep your lawn going until the next application off irrigation or rainfall comes along.

    The root system has two main jobs – to provide the turf foliage with all the nutrients it needs and to source the water your lawn requires to survive. It is important to note that the root hairs are predominantly what allows the root system to be able to take up nutrient from the soil for the lawn to survive well, and it is both the root hairs and ‘tap roots’ that find water for the lawn.

    Good irrigation practices are also very important – deep infrequent irrigation results in roots growing deep into the soil looking for moisture.

    Influences on developing a better lawn root system

    Plant species – some species have ability to grow a deeper and more vigorous root system than other grass types

    Soil type – The make up of your lawn’s soil type will have an influence on how your lawn’s root system develops. The heavier the soil the less the air space and often can be waterlogged in nature this will restrict root growth.

    Thatch levels – Lawns with high levels of thatch are very restrictive in their ability to produce a deep root system. Thatch is said to hold around 33% moisture, many lawn soils will have less moisture that what holds. This basically means lawns with an excessive thatch layer will result in a short root system as roots will choose to mainly lives in the thatch as the thatch layer has a higher moisture retention than the soil below meaning the roots will have no reason to grow deep as they are being well accommodated in the thatch layer.

    Climate & Soil temperatures – The growing conditions and general temperatures have a major influence on our ability to grow a good root system.  As a general rule the more the turf is growing the better the chance the root system will be too. Good growing conditions coupled up with good maintenance are a major influencing factor on your lawn growing a deep root system. It’s also worth noting soil temperatures will always be a few degrees lower than regular air temperatures. Cool season grasses develop their root systems best when soil temperatures are around 16-17 degrees

    Insect and disease   – Insect and disease activity has potential to restrict the development of the root system.

    Above all, the stronger the lawn is, the better the root system is and the higher the threshold will be for wear & tear on the lawn, and the faster the recovery will be when wear & tear does take place.

    Developing a better root system

    To develop a deep and vigorous root system, the following rules need to be adhered to;

    • Ensure your lawn is irrigated deep and infrequently – this will ensure the roots will grow deep looking for moisture for the plant. This is most important throughout spring as this is when the root activity is at its greatest for cool season grass and it also helps your lawn to harden up leading into summer.
    • Minimise thatch at all costs. Thatch reduction should be undertaken at least once per year through scarifying.
    • Aerate your lawn at least once per year – this will reduce the compaction, provide a good amount of air into the lawn profile, reduce thatch, and provide an easy avenue for roots to grow deep chasing water.
    • Don’t over fertilise – Avoid excessive applications of Nitrogen – not only does this lead to excessive thatch accumulation, excessive applications of N also leads to carbohydrate exhaustion. This exhausts the carbohydrate reserves and the root system ultimately suffers as its the lowest priority of the plant. Nitrogen is required in measured amounts in order to help the root system to develop, but it must be carried out in a measured way, following the ‘little & often’ rule.
    • Apply Phosphorus and Potassium. Both these nutrients are closely associated to root growth.
    • Apply seaweed base products to your lawn – seaweed products contain the plant hormone Auxin that can assist in the development & maintenance of the root system
    • Avoid scalping from mowing. Observing the 1/3 rule is important. That is to never remove any more than 1/3 of the height of your lawn in any one mowing as this requires energy from the root system to repair the damage to the surface of the lawn when its scalped.
    • Avoid stressing your lawn if your lawn is sick – any stressful inputs or over usage all stress the root system further.
    • Avoid stressing your lawn unnecessarily during spring, especially for cool season grasses as this is when root growth is at its greatest, especially avoiding using herbicides during this time.

    Based on above, a simple conclusion can be made;

     “Any lawn that has a deep and vigorous root system will have very little problems”

  • Why is Iron used on lawns? Should I use Iron on my lawn?

    Why is Iron used on lawns? Should I use Iron on my lawn?

    Iron is used on lawns to improve a lawns overall colour and presentation. When used on your lawn particularly in conjunction with nitrogen, iron can increase the depth of green in your lawn significantly. Iron is often used in professional turf situations such as sportsfields and golf courses to improve the way the turf will present. This often done leading up to big events that will be shown live on TV.

    If you want your lawn to look amazing, consider applying iron to it as the icing on the cake!

    Other than improving colour, what else can iron do for my lawn?

    • The application of iron plays a role in reducing leaf diseases in your lawn.
    • Iron can reduce and in certain situations control moss.
    • When your lawn has adequate levels of iron it adds strength to your lawn increasing its ability to deal with wear and tear.
    • As iron improves your lawns colour it can stretch out the time between other fertiliser applications.

    What should I remember when applying iron?

    • The most common and successful way to apply iron to your lawn is to spray it on using a knap sack. The iron needs to be diluted in the knap sack and sprayed across your lawn evenly at least in two different directions. The watering in of the iron after application is optional, it doesn’t have to be watered into the turf to be effective. The uptake of the iron by your lawn will be instant, meaning you will see your lawn progressively darken in colour straight away if applied correctly at the right application rate.
    • Iron is most effective when your lawn is strong and healthy as the uptake of the iron by your lawn will be much better if your lawn is in a healthy state at the time of applying it.
    • In order to get the best out of your iron application to achieve a deep dark green colour; its best to apply iron about 10 days after an application of granular NPK fertiliser has been applied as your lawn will be actively growing after the application of this fertiliser and the iron uptake will be most effective.
    • When applying iron, it is best to avoid it in the heat of the day. Generally there will be a little bit of leaf burn when iron is applied, and this can be worse if sprayed in the heat of the day.
    • There are many different products on the market that contain iron. Some are fancy branded liquid products with chelated formations, and some are more basic powdered products such as Ferous sulphate which are much cheaper to purchase. Generally speaking, most forms are effective and will get the job done in a lawn situation. It is always best to ensure you follow the label application instructions and application rates.
    • A word of warning when applying iron is it can stain your hard surfaces such as concrete, pavers and timber. If there is overspray onto these surfaces it is best to wash it off immediately using a hose to avoid staining.

  • Do I need to aerate my lawn?

    Do I need to aerate my lawn?

    At some point in time all lawns will become compacted and to achieve a high-quality lawn, aeration is needed to improve the health of your lawn. Although aerating lawns is not that common and usually restricted to a professional turf environment, if your lawn can be aerated the benefits will show in your lawns overall health – air is an important component for your lawn to be healthy. Aeration can be done in many forms, the focus is to create opportunity for air, nutrients and water to enter your lawns soil profile while at the same time increasing drainage and decreasing thatch. In simple terms lawn aeration is the practice of perforation of the soil through physical injection.

    It is recommended that any aeration that is carried out is done during either the Spring or Autum growing seasons to allow the turf to take advantage of the growing conditions. Additional to aerating the whole lawn, homeowners might just choose to focus on areas that are under stress through excessive use, pest attack, or suffer from excessive shade – aeration in these circumstances will greatly assist in the recovery of such areas.

    Options to aerate your lawn are as follows;

    • Hire a motorised lawn aerator that uses solid tines or hollow tines to create the holes
    • Hire a contractor to aerate your lawn for you
    • Use a standard garden fork
    • Use spiked walking shoes purchased from a local garden supplier
    • Use a hand corer or spiker purchased from a local garden supplier
  • How to prevent weeds in a lawn?

    How to prevent weeds in a lawn?

    Weeds in lawns is sadly a challenge that we have no choice but have to deal with as part of having a residential lawn. The key thing to remember is the better kept your lawn is and higher the density of your lawn is the less opportunity there will be for weeds to invade your lawn. In many ways this in itself is an incentive to keep your lawn well maintained as it provides natural resistance to weed infestation.

    In Tasmania, the two main chemical options for weeds are MCPA and Dicamba. MCPA targets most weeds present in a lawn situation while Dicamba takes action against clover in your lawn. There is a readily available product call Kamba M which combines both products if you would like to target both weeds and clover at the same time.

    If the population of weeds in your lawn is not too high and depending on the weed species, removing them by hand may not be as difficult as it sounds. Sometimes it’s just as quick and easy to remove them by hand as the result is instant.

    Once weeds have been treated through chemical application or removed by hand, there are several things you can do to help the weed infested area to recover & help protect your lawn from re-infestation:

    • Fertilise your lawn – this will assist recovery promoting a healthy lawn that is less likely to be reinvaded by weeds
    • Re-seed thin areas– if there are bare spots in your lawn from the weeds dying or being removed, if weak or thin areas are just left, it’s likely that weeds will creep back into these areas.
    • Be careful not to over-water – as we know weeds respond quickly to water, if your lawn is being overwatered it’s likely that weeds will be promoted over grass and eventually take over.

  • What is thatch?

    What is thatch?

    In the world of professional sport turf management thatch is well talked about subject, less however when it comes to home lawns. Excessive thatch is one of the main reasons a lawn will require a renovation. Thatch is the layer of organic matter layer that sits between grass surface and the soil, thatch is the decomposed and undecomposed organic matter produced by the grass itself. Thatch accumulates naturally as turf grows, generally the faster a grass species grows, the quicker thatch can accumulate. This can be magnified through high inputs such as excessive watering and high fertiliser inputs. You may remember walking over a lawn that feels spongy under foot? That’s the excessive thatch layer you can feel.  Sometimes considered somewhat good in a lawn environment because of the soft feel it can bring to a lawn while also increasing the wear tolerance of the lawn, however, we don’t like the thatch layer becoming too excessive in a lawn because;

    • It holds more moisture than the soil itself, meaning grass roots prefer to live in the thatch rather than grow deep into the soil. Resulting in your lawn drying out faster during hot weather.
    • It increases the likeliness’ that insect and disease will become a problem
    • As its soft in nature, it increases the chances of the mower sinking down in the thatch layer and scalping as a result making the lawn present poorly.
    • It slows the rate your lawn will drain as water moves through it slowly.
    • It prevents fertiliser from entering the soil profile to encourage the roots to grow deep

    What are the ways to reduce thatch?

    • Scarifying
    • Aeration
    • Sand topdressing
    • Select grasses that produce less thatch
    • Restrict fertiliser, especially nitrogen
    • Reduce water inputs, only water your lawn when it really needs it
  • What is the best material to top-dress my lawn with?

    What is the best material to top-dress my lawn with?

    What are the advantages of topdressing my lawn?

    Washed river sand is a popular choice for top dressing turf due to its excellent drainage properties, fine particle size, and it’s generally easy to access in Tasmania while being relatively inexpensive. There are many quarries around that grade the sand well ready to use in on awns. Often quarries will wash the sand that removes silt, clay, and organic matter, making it an ideal material for improving turf vigor and presentation of lawns.

    Benefits of using sand for lawn topdressing

    1. Promotes uniform growth and surface leveling
      Top dressing with sand helps smooth out rough or slightly undulating areas on a lawn, providing a more uniform surface. Sand is fine in texture and easy to work with making it easy to distribute across your lawn, filling in low spots while still making it possible for your grass to grow through it.
    1. Improves drainage
      One of the main reasons for using sand for top dressing is its ability to enhance drainage. When sourced correctly the sand particles are uniform and can greatly improve your lawns drainage ability, allowing water to move freely through your lawns growing medium. This is especially beneficial for lawns that have heavy or slow draining soil that retain excessive moisture.
    1. Reduces the build up of heavy soil sticking to everything
      Due to the fine, free draining nature of sand, once spread across your lawn, especially once done a couple of times it naturally acts as a buffer between the heavy soil and your family’s shoes and equipment such as mowers. This is particularly helpful if your lawn soil gets very muddy through the winter months. Adding sand topdressing is a great way to keep this problem under control.
    • Assists in distributing doggy deposits
      With the presence of a good sand layer in your lawn’s surface can greatly assist with the aftermath from your dog’s deposits and assist to move it through your lawns surface faster resulting in less burning of your turf from your dog’s urine due to the free draining nature of sand.
    1. Prevents disease and fungal growth
      Turf diseases are moreso an issue in compacted, poorly drained soils. The addition of sand to your lawn through ongoing topdressing improves aeration and drainage. Through water moving through your lawn faster reduces the possibility of your lawn getting disease.
    1. Dilutes thatch
      The addition of sand to your lawns surface naturally dilutes the thatch layer in the surface also known as the organic layer that sits between the turf surface and the soil. Each time your lawn is top dressed with sand the thatch layer is diluted further.

    Finally

    When topdressing your lawn with sand, a thin layer should be spread evenly across the whole area. The standard rate is around 1/3 of a cubic meter of sand per 100m2 of lawn area. It’s important to top-dress your lawn when it is actively growing so the grass grows through the sand in a reasonable timeframe ensuring the sand does not sit on top of the lawn too long. The best time for topdressing is either spring or autumn. After the sand is applied, wait for it to dry, then the final process is to rub the sand into the turf using a level lawn, a broom or a straight edge – there should be a reasonable amount of grass showing through the sand once the whole process is finished if the right amount of sand has been applied.

  • What’s the best way to water my lawn?

    What’s the best way to water my lawn?